Monday, December 24, 2012

How to Save Tomato Seeds

This year we had a need to save tomato seed for the first time because we were running out of our beloved Blondkopfchen yellow cherry tomatoes from Seed Savers Exchange, and we also wanted to save seed from a wayward tomato plant that found its way to our garden this year via the community compost. Of course we intended to save seed at some point which is part of the reason we buy open pollinated and heirloom sees. It was a cool process and I wanted to share our experience. The interview with the SSE president about the importance of seed saving in this quarter's Urban Farm magazine reminded me that I still needed to write a post about so here it is.

Instructions:
The instructions we followed were from the 2012 Baker Creek catalog which had a great photo excerpt of Jere Gettle's The Heirloom Life Gardener showing the steps for saving seed (in pic below). We supplemented these instructions with some from the International Seed Saving Institute.The steps below in bold are from that site interspersed with photos and comments (in italics) about our experience.

What did we want to save?
We were trying to preserve seed from our Blondkopfchen and also from our amazing "volunteer" red cherry/roma mix that appeared in our garden this year uninvited but which was beyond prolific. 


Process: Cut the tomato into halves at its equator, opening the vertical cavities that contain the seeds. Gently squeeze out from the cavities the jelly-like substance that contains the seeds.


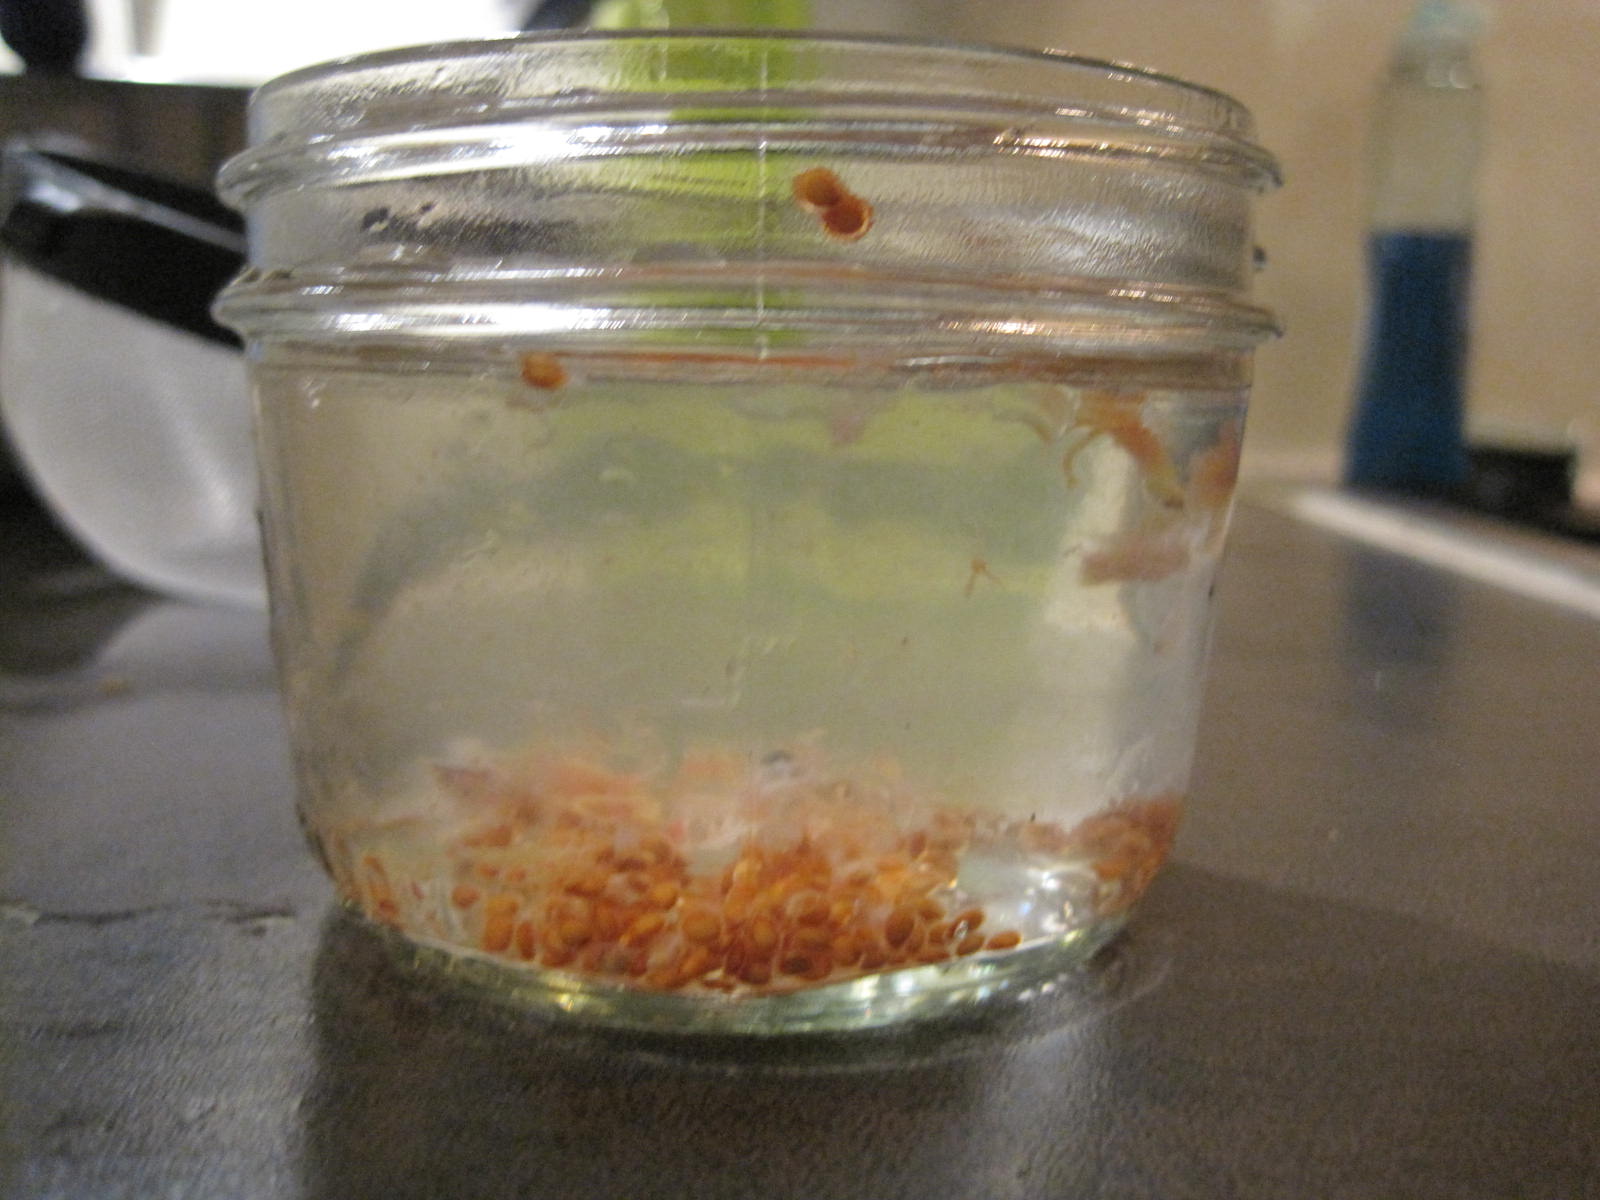
Place the jelly and seeds into a small jar or glass. (Add a little water if you are processing only one or two small tomatoes.) Loosely cover the container and place in a warm location, 60-75° F. for about three days. Stir once a day. We forgot to stir. Whoops.
 

A layer of fungus will begin to appear on the top of the mixture after a couple of days. This fungus not only eats the gelatinous coat that surrounds each seed and prevents germination, it also produces antibiotics that help to control seed-borne diseases like bacterial spot, canker and speck. What they didn't say was that this fungus smells really bad (kind of like moldy cheese). The red tomato had bigger pieces so it developed a fungal layer much more quickly than the smaller yellow ones.


Here they are after 4 or 5 days. We couldn't get to them right away so they may have sat longer than they should have. Again, whoops. 

 
After three days fill the seed container with warm water.


 Let the contents settle and begin pouring out the water along with pieces of tomato pulp and immature seeds floating on top. Note: Viable seeds are heavier and settle to the bottom of the jar. I thought the instructions were wrong because if I poured out the contents I thought the seeds would also slip out. So instead I tried to spoon off the mold. Ugh. It was gross and didn't work. I finally did as the instructions advise and just poured and lo and behold the icky stuff poured right out with no fuss.

 Repeat this process until water being poured out is almost clear and clean seeds line the bottom of the container. Pour these clean seeds into a strainer that has holes smaller than the seeds. Let the excess water drip out and invert the strainer onto paper towel or piece of newspaper.  We didn't have a strainer fine enough so I just poured out as much water as I could and then poured the rest through a paper towel. This worked just fine.


Allow the seeds to dry completely (usually a day or two).


Break up the clumps into individual seeds, label and store in a packet or plastic bag. I didn't realize the seeds would have a little furry coating. I took out some packet tomato seeds to compare and sure enough, they also have a furry coating. This produced a remarkable amount of seeds. We will have enough for years to come, but if we have a particularly good year with these next year I may do this process all over again to keep breeding stronger performers. 


Reflections on Seed Saving:

I can't yet comment on the vitality of the seed (will follow up this summer) but the process definitely made me feel like I am contributing to the ongoing story of our planet's food legacy, particularly by saving seeds from the volunteer tomato. To be an heirloom an OP seed needs to be between 30-50 years old by most definitions but usually getting to heirloom status means that a plant worked particularly well in one part of the country for a long time. This tomato plant appeared in our garden unexpectedly but was so successful we wanted to save it to try again. In Michael Pollan's Botany of Desire terms, this plant "used" us to help it procreate by offering us something we wanted: an abundance of tasty fruit. If we are still using it in 30 years Seed Savers Exchange may even want some of them :)

Rosalind Creasy's, the author of Cooking from the Garden and quoted in the Jan/Feb 2013 issue of Urban Farm, description of what would go on SSE packets if there were space sums up my feeling nicely: "By planting the seeds in this packet, you have become a steward of our food heritage, a link in a chain that goes back thousands of years. Use his seed to grow food, but please save the seeds, share them with others and replant them again in your garden to allow the seed to adapt to your local growing conditions."

Monday, December 10, 2012

December Harvests

Sorry everyone for the long blogging break. What can I say? Babies keep a person busy. But I thought I'd share some December gardening harvest pictures (that's right, December harvests). We are having unseasonably warm weather and that, plus our rowcover is giving us a continued harvest of yummy veggies including red and green mustard, onions, cylindra beets, radishes, and lettuce (including my new favorite Merveille des Quatre Saisons or Marvel of the Four Seasons).


Friday, October 5, 2012

Seeds for Cold Weather


Our seed order is here! It includes a few more things we may be able to squeak out for fall but otherwise it is all for spring. We aren't going to do a CSA share next year since we haven't been super pleased with what we have received.  We are going to garden more and visit the farmer's market more instead. However there are several things we were introduced to via the CSA that we do not want to give up, and we are going to try our hand at growing those. Here is what we ordered:

Mizuna - This is spicy asian green we usually get from the CSA)

Tatsoi - This is a spicy asian green we usually get from the CSA that hubby loves to use in pesto

Rainbow Swiss Chard  - Hubby loves it and I like the look of it when it is growing so we are going to try it)

Parsnips, Harris Model - We usually do Hollow Crown but we love parsnips a ton (obviously) we are going to plant both kinds next year. We might try and get a sowing of this in for fall so that we have early spring parsnips.

Broccoli, Calabrese Green Sprouting - For some reason growing broccoli has always intimidated us, but we're gonna give it a go next year. Our attitude now is that with the row cover anything is possible!

Onion, Red of Florence- We are already planning to grow onion from seed for the first time next year instead of getting sets. If I am going to do all the work I figured we should try two types of onions and not just one.

Beets, Yellow Cylindrical- We love golden beets and the cylindras we have are so easy to cut so we thought a gold cylindra would be awesome. Turns out these are actually mangels (super big roots grown for animal fodder) but we'll see how they taste. As long as we pick them small they won't have a chance to go behemoth on us.

Beets, Chioggia (striped)- We are in a beet faze and I have always been intrigued by these striped beets. Plust they are supposed to taste less "earthy" than regular beets.

and for our free gift (Baker Creek always includes one) we got American Melon. I'm not a huge melon fan and we don't really have the space for melons, but I'm sure we can find some use for the seed. 


Tuesday, October 2, 2012

Patching the Row Cover


This weekend we realized that the edges of our row cover where we drive in the garden stakes to secure it to the ground had made large holes around the stake entry points. This is caused by a combo of normal wear and tear and the number of wind storms we had this year. My clever hubby found a great way to patch it though. Just like all other row cover care, he used good ol' duct tape. He placed a piece over the stake holes and then drove the stake through. Now the stake still has something to grip and the cover is very secure. 


Sunday, September 30, 2012

Fall Garden Guilt Assuaged


We got over to the garden today and finally got some more things planted for fall. Good thing because I was really starting to feel guilty that my fall garden plan flew out the window. (I know, why did I think we would have an awesome fall garden when we have a brand new infant...crazy, right?! But we had baby help this weekend so we were able to make time to garden). We are planting super late we realize, but we hope that the row cover will extend our season. Supposedly it protects the plants down to 28 degrees. Then we will switch it out for a plastic cover. Our average first frost is October 15th but may come a bit later, so we will see how things go.


We planted more cylindra beets since our lack of watering has yielded only 4 seeds that germinated. Sadly I'm out of Golden Beet seeds which I only realized when we got to the garden. :sigh: We filled in the lettuce with some romaine and bibb, planted a row of butterhead lettuce, a row of Japanese red mustard, a row of regular mustard, a row of kohlrabi, a few wax bean seeds, and assorted radishes. We also planted one brussels sprout as an experiment since it is our first time growing it, and we are beyond late in getting the seed in the ground.  We'll see what happens. At least we can try again with them in spring.


The canola cover crop that we planted in the big bed last week is popping up. At first I always think they are weeds. We need to fill it in in some places, but it should keep the erosion under control this winter.


Our peppers are still going strong and the bees are definitely enjoying the basil seed stalk flowers as you can see in the picture at the top. Our neighbors all have amazing peppers right now too, so I think the conditions may just have been right this year.


Our blackberry is beyond out of control and is trying to assimilate the fence. Once the berries are ripened and picked this is getting whacked back.


We also got some more compost going and for once we remembered to bring some brown matter (shredded newspaper) and not just our green matter kitchen scraps. I'm trying harder since I don't want to attract any more critters.


Saturday, September 29, 2012

Recipe: Healthier Pumpkin Granola


Since it is fall I thought I'd share my recipe for pumpkin granola. I make a batch every week and then have it with greek yogurt each morning for breakfast. I typically make "healthy" granola so it is not very sweet. If you like sweeter or richer granola, just up the sweetener and add  more goodies (nuts, dried fruit, etc). It is really customizable so if you don't have all the ingredients, don't sweat it and if you want to add other things in it, go for it. Enjoy!

 Supplies:
2 mixing bowls, one large & 1 medium
2 baking sheets
1 rubber scraper
1 mixing spoon
Measuring cups


Ingredients:
Dry:
6 cups Rolled Oats aka "Old Fashioned Oats"
1/4- 1/2 cup Flax seed (ground)
1/4 cup Wheat Germ
Few shakes of Cinnamon
Dash of Nutmeg
Dash of Ginger
(and other spices to taste)
3/4 - 1 cup Coconut Flakes (or brown sugar, sugar in the raw or other sweetener--adjust amount to taste)

Wet:
1 Can of Libby pumpkin puree or equivalent amount of pureed fresh pumpkin
3/4 cup Applesauce
Squeeze of Honey

Recipe: 
1. Preheat oven to 375 degrees.

2. In the large mixing bowl combine the dry ingredients.


3. In the smaller mixing bowl combine the wet ingredients.

 
4. Pour wet ingredients into dry and combine. Mix until the wet ingredients are thoroughly dispersed and most of the flakes are no longer dry looking.


 5. Pour onto the baking sheets and smooth out. This will allow it to cook more evenly.


6. Cook for 30-45 minutes or until the granola reaches the texture you prefer. The shorter time will yield granola that is a little more chewy and the longer will yield crunchy, hard granola.


7. Let cool and then store in an airtight container.


Eating Suggestions:

This tastes great in yogurt, mixed with applesauce, put on top of ice cream or even eaten with milk like cereal.


Thursday, September 27, 2012

Fall Garden Clean Up

Last weekend we cleaned up the garden for fall. Even though I planned out what we should plant when for the fall garden, life got in the way and most of that did not make it into the ground. What can I say, life with an infant is hard. We did manage to plant the row cover bed though and some things are starting to sprout including some yummy oakleaf lettuce. 


We cleaned out our compost bin, mostly to try to discover what kind of critter was living in it. We're thinking chipmunk because the holes are small and it stole plastic bags from somewhere and threaded them throughout our pile like a nest. We could put out a trap for it, but it hasn't stolen any produce and if anything it has helped us out by turning our compost a bit so for now I think we're cool. Plus, you can see below how empty it is now, so we may have accidentally evicted it.


The prolific volunteer tomato soldiers on; although, it is looking rather ragged---kind of like a tomato fountain. Somehow though it still has lots of green tomatoes so it may just stay til the frost comes.


Our regular tomatoes are still producing but they are slowly petering out. Still quite a few green ones on the vines though.


As I mentioned in a previous post, the peppers are still going gangbusters as well. This has been the best pepper year we've ever had but we deserve no credit. They have flourished under our neglect (and from the spill over from our neighbor's irrigation set up).


The two basil plants I transplanted to the garden towards the end of the season have set seed (which the bees are enjoying) but otherwise they look great. We planted so many kinds of basil this year I lost track of which one this is.


We mulched our very sad raspberries which we almost killed by stupidly putting wood chips underneath them early in the season. We did not know at the time (but do now!) that woody material requires extra nitrogen to break down...which it stole from the raspberries. Sadly they did not even send out runners this year when we usually have so many we can't give them away. Time will tell if they come back next year or not. But they did set a little fruit for their second harvest (they are everbearing).


The blackberry mini-bramble is doing something, but I already nibbled all of these while I was there the other day.


Now the plot is pretty well cleaned up (if sadly empty). We sowed our winter canola cover crop in the big bed and will probably also do the tomato bed once they are done. Hopefully I can still sow some more in the covered bed and possibly in the pepper bed if those finish up soon.