A blog about our efforts to establish a suburban homestead in our quarter acre back yard where we grow (mostly) organic fruit and veggies while battling grass, clay soil and the various gardening ills of Mid-Atlantic region. Join us as we garden, cook, up-cycle, build, create, and enjoy.
Wednesday, September 19, 2012
Eternal Gardening Optimism: A review of "The $64 Tomato"
As this year's gardening season begins to close I find myself taking stock of what worked, what didn't and what I want to try/change/do next year. This happens at the end of each season but the one noticeable characteristic of this yearly assessment is how quickly I focus on all the ways the garden will be *better* next year. My mind has almost tunnel vision, immediately forgetting the garden dramas of this season and instead imagining the garden of next year which of course will have no pests, no blights, perfect germination, amazing yields, and enjoy wonderful weather all season. We have been gardening for a few years now so of course we know this is not possible and yet, I spend most of the fall and winter of each year in this magical mind place. I never really thought about this little yearly leap from reality until I read the book "The $64 Tomato: How One Man Nearly Lost His Sanity, Spent a Fortune, and Endured an Existential Crisis in the Quest for the Perfect Garden" by William Alexander.
I read this a while back and enjoyed it so much I had hubby read it too. The quick synopsis is that he and his family move to the Hudson Valley in NY and are able to build a garden, which he does on a mammoth scale which overwhelms him as the years go on. He chronicles his adventures some of which are laugh out loud funny and some that give him very amusing insights including why reel lawn mowers aren't worth the trouble (quotable observation "I bought this mower so you won't have to"); why you probably won't win against the critters eating your garden produce (quotable observation "you may be smarter, but they have more time"); why gardeners can't vacation in the summer; and one of my favorites, when he realizes that he created his own ultimate garden nemesis by accidentally encouraging an accelerated natural selection process of woodchucks on his property that weeded out all the dumb ones leaving only a very savvy "super chuck" who could get through the strongest electric fence to feast on his heirloom tomatoes. But his greatest insight will likely resonate with gardeners everywhere: he observes that most gardeners are filled with an overwhelming optimism each year that trumps whatever bad experiences they've had in their garden previously. Simply put, gardeners favor "optimism over experience."
This struck a chord with me because I am the queen of this. Here are some of the flights from reality that I have been on at the end of seasons past: So what that the Mexican Bean Beetle ate all our beans this year; it can't happen two years in a row, right? (the reality check: of course it can!). Who cares that most of our heirloom tomato plants got burned from the extreme sun and heat this year; next year the weather will be perfect! (the reality check: it will likely be just like this year). What does it matter that we have not yet been successful growing cucumbers in the garden? Next year we will try a different trellis system/place in the garden/watering amount, etc and it will finally work. I could go on but you get the idea and if you love gardening you probably do this to. This used to drive my hubby crazy but thanks to this book, now he just chuckles at me and says "I know, I know...optimism over experience."
If the definition of insanity is doing the same thing over and over and expecting different results, then aren't all gardeners insane? No because we do try different things to fix the problems we've encountered. But as Mr. Alexander points out, for some reason we just forget all the bad stuff, or rather, don't forget it but give it less weight in our minds and instead seem to focus only on all the ways that our garden will be better next year. Given how much effort it takes to keep a garden going, especially an organic one where everything is grown from seed in a community garden that is hyper pest infested, this is probably what gives us (me and hubby) the mental energy to do this year after year. It is a little mental sabbatical that gets us ready to throw all our physical energy into the endeavor one more time.
This matters this year especially because for me, this was a very frustrating gardening year. I was hugely pregnant and then had a newborn for most of the gardening season and had to leave all actual garden work to my husband, living vicariously through him. Sure I contributed a little, making seed tape, planting lists & diagrams, and diagnosing plant problems via cell phone pictures but it's just not the same thing. This experience could have put me off the whole gardening thing altogether. But remarkably, all that is already forgotten and my mind is already in that dream garden....of next year.
Definitely read "The $64 Tomato" if you get a chance because it is definitely one of the best gardening narrative books I've read in a while.
I should add as a disclaimer that some people found parts of this book offensive from an animal rights point of view because of how he deals with deer, opossums, woodchucks and other critters invading his garden (based on a quick skim through amazon reviews). I'm not going to judge him because I haven't gardened where he has and for people who are able to never use a pesticide and can live in harmony with their unwanted visitors, good on you. But some of us are in absolute wars in our gardens and sometimes extreme measures can be necessary if you want to feed yourself. Not saying I condone all the stuff he does in the book (re: opossum), but it happens.
Friday, August 24, 2012
Single Stemming Tomatoes: Does it work?
What the heck is single-stemming?
Single-Stemming requires you to pinch off the suckers (those extra tomato stems that grow in the notch between the stem and branch of the plant) so that the tomato grows mainly on one stem with only main branches. This allows the plant to focus on setting fruit instead of growing more greenery. When the tomato reaches the top of the trellis you top it off so that the plant focuses the rest of its energy on the remaining fruit below.
We have tried to do this in previous years but it is much more difficult to get to all of the plant when it is caged and after a week or two we usually forget. Then overnight the plant sprawls everywhere and we give up. Not this year. After we saw the youtube video below we were convinced that if we did this religiously it would yield us more tomatoes.
Even though we don't square foot garden (after our very bad experience year 1 of community gardening), this convinced us that in addition to the single-stemming we should also try trellising again. We made really inexpensive trellises year 1 from conduit we bent to shape at Home Depot. But unlike years past, we bought trellis netting this year instead of using single strands of jute, nylon cord, and other trellis materials we have used before (which have all buckled under the weight of the plant before the end of the season).
How did it all work out?
Following this method we were able to fit many more tomatoes in our tomato bed. The trellis netting held the plants up exceptionally well as long as we stayed on top of weaving the new branches through the squares in the net. The single stemming kept the plant looking lean and orderly and still allowed it to set tons of flowers that turned into many, many tomatoes.
Also, we had better air flow that I believe prevented the spread of disease. Our garden neighbor usually crams 20 tomato plants in his 4x8 beds and invariably they are disease ridden by early June. This doesn't bother him because he has so many plants that enough survive to meet his needs, but to us, with our handful of plants, this is very worrisome. This year it was particularly bad, and I feared that it would quickly spread to my heirlooms (which have no specially bred disease resistance) that were only a few feet away.
But lo and behold, it is the end of the summer and whatever was affecting our neighbor's didn't bother ours. We did eventually end up with a little blight but even that took a long time to spread to all our plants, and I believe the air flow made the difference.
The final verdict:
Single-stemming plus deep watering (post coming soon) is the way to go. This is definitely how we plant to grow all our tomatoes in future seasons. The results make it worth the extra work.
Shared on Frugal Days, Sustainable Ways #41
Also shared on Simple Lives Thursday #110
Saturday, August 11, 2012
Saturday, August 4, 2012
15 Non-Traditional Things to Compost
Let me just start out by saying, I heart compost. Love it. You are making the best soil on earth, supporting an ecosystem, and reducing the amount of garbage you send to the landfill. Total win-win.
However, as much as I love composting, I am often disenchanted (or downright alarmed) by the advice given online for things you can and cannot include in your compost pile. We all know the common things you can compost: egg shells, coffee filters, kitchen scraps, garden waste, etc. But some people get so excited that they encourage others to compost all sorts of things that won't work for all gardening situations.
For example, I disagree with some common guidance like composting pizza boxes because the grease is sure to attract critters that I DO NOT want in my garden (raccoons, anyone?). Same goes for old bread products and left over cooked rice. You could compost wood ash but my soil is already too alkaline, so I don't want to make it worse. In my situation, more pine needles would be helpful (but if you have acidic soil, stay away from these).
Here are some things you may not have thought about composting but should be safe in nearly every compost pile. Most of these would be considered "brown matter" items:
- Dog or cat hair (finally put that stuff to use! Grab the hair from the swiffer or the vacuum and throw it in)
- Your hair (grab the hair off your brushes)
- Finger and toe nail clippings (yours and the dog's too)
- Cardboard tubes from toilet paper, wrapping paper or paper towel rolls (ripped up into smallish pieces)
- The contents of your paper shredder (as long as it is mostly normal paper and not cut up credit cards or glossy things)
- Brown paper lunch bags (we make our own microwave popcorn using lunch bags and organic kernels and whatever doesn't pop gets composted along with the bag--again rip it up into pieces)
- Paper egg cartons (break into small pieces)
- Tissues (if they have no lotion/aloe)
- Some paper towels (if they were just used for light kitchen clean up and don't have cleaner or lots of grease on them--use your best judgement)
- Wooden toothpicks (did you put in a toothpick to see if your cake was done? Compost it!)
- Cotton balls (depending on what they were used for--again, use good judgement)
- Cotton Q-tips (not the plastic center kind)
- *Dryer Lint from your whites load (avoid lint that has absorbed dye) *This is only suggested for folks who don't use dryer sheets because the dryer sheet chemicals impregnate the lint otherwise and probably shouldn't end up in the garden
- Yarn scraps from natural fibers like wool, cotton, or bamboo (Keep all those little end snippings in a bag and throw them in the compost once in a while. Just make sure no acrylic or synthetics get in there)
- Vacuum bag contents (again, use your best judgement--if it is just dust and dirt you are good to go)
Good general rule of thumb: Beware of composting anything that could attract critters you don't want, anything with a lot of ink or paper that is glossy, anything that may have come in contact with chemicals you wouldn't want near your plants, and anything that is likely to throw your soil ph in a direction you don't want it to go. (While Joan Dye Gussow composted a woodchuck in her book "This Organic Life," I personally wouldn't chance it).
What are some non-traditional things YOU compost?
Featured on Simple Lives Thursday and Frugally Days, Sustainable Ways.
Wednesday, July 18, 2012
Recipe: Easy Roasted Beets
Just took the last of the beets out of the garden yesterday. This got me thinking that we should post about how we usually use them up. Typically we roast them in the oven. There are many ways to roast beets, which seem to be the super food du jour, but as with all things we favor the simple method. This recipe roasts the beets with the skin on and doesn't require par boiling or making foil packets, etc.
Supplies:
Knife and cutting board
Bowl
Spoon
Baking sheet
Ingredients:
Beets (lots or only a few)
Olive oil (or oil of your choice)
*Sea salt
*Optional but gives it a nice flavor
Instructions:
1. Preheat your oven to 425 degrees.
2. Take your fresh from the garden (or wherever) beets and cut off the beet greens (but don't throw them out--we'll do a beet green recipe as a future post).
3. Scrub up the beets to get all the dirt off. (If you clean them before you cut off the beet greens be sure not to get the greens too wet; they will last longer in the fridge if they stay dry).
4. After they are all cleaned up cut them into small pieces. The Cylindras (red ones in pic above) we cut into medallions since their shape makes them so easy to cut, but the Goldens we tend to cut into little quarter sections. The smaller the pieces the faster they will cook.
5. Put your cut up beets into a large bowl and drizzle olive oil over them. Mix with a spoon so each piece is more or less covered and then spread them out onto your baking sheet. If you are plan to use salt, then take your sea salt grinder and sweep it quickly across your beets now (or just lightly sprinkle by hand).
6. Put sheet in the oven and bake for 30-45 minutes or until you can easily pierce with a fork. If you are only doing a few beets reduce the cooking time and check them often. When you take them out they will look a bit shriveled and reduced in size.
7. Try and get them to the table before you eat them all right off the baking sheet.
Enjoy!
Featured on Gastronomical Sovereignty
Sunday, July 15, 2012
Thursday, July 12, 2012
Use Homemade Seed Tape to Pre-Plan Your Fall Garden
I mentioned a few months ago that we were going to test out making our own seed tape following Garden Betty's instructions. We tried it with a single row of Golden Beets, and it was an astounding success (see here for pics). Not only did it make sowing seed much easier (no accidental volunteer seeds falling into other rows), but I think it actually helped improve our germination rate.
Since we are actually expecting a baby any day now and will not have as much time to devote to the garden the rest of the summer, it dawned on me that I could make seed tape ahead of time for all of our fall garden sowings to make it easy to plant what we want quickly and efficiently (especially when we are highly sleep deprived with a newborn).
After making all this tape, I realized this could be a great overall garden planning tool for anyone because it makes you really think through what you are going to plant and what you can actually fit in your garden and allows you to prepare ahead of time. Some people have no problems with this but we are newer to gardening and still screw things up from time to time.
Why do this when it is so time consuming and you can just direct sow into the garden? Here are a few reasons:
- It forces you to plan out your space precisely. Helpful for those of us who tend to think they have a way bigger garden then they actually have and who rudely realize this after they have planted too much of something and have run out of space for other things.
- It makes sowing easier since you only have to scoop out a little trench the right depth, throw the tape on it, and cover it with the soil. We found this a bit more back saving then normal sowing and MUCH quicker.
- It helps you plant things with consistent spacing, and if you are careful, at a consistent depth. This makes your rows look neat and tidy and improves your germination since you didn't accidentally sow one seed 1/2" deep when you should have sown it 1/4" deep.
- It aids germination because the paper helps keep seeds moist. This is particularly helpful for seeds that are garden princesses like carrots and parsnips that refuse to germinate if they are not kept comfortably moist in the beginning.
- It makes succession planting a breeze because you can tear however much tape you want to plant at one time and save the rest for a later planting. Again, of course you can do this with seeds, but I know we at least never end up doing succession planting because sowing is already time consuming and we don't want to do it twice or we forget to bring the right seeds to the garden.
- It allows you to prepare things ahead of time if you know you will be strapped for time at a certain point in the season (like if you are having a baby for example) or if it is winter and you want something garden-related to do.
Convinced? Then just follow the steps below.
Step 1: Planning Phase--Get out all the seeds you want to plant for your summer or fall garden. Figure out what you want to go in which garden bed and then use the row distance measurements provided on the seed packets to figure out how many rows of seed tape you will be able to fit your space. To help me, I drew out a picture of my beds and how much could fit where. (For example, my big bed is 8'x 8' but I have beams in a t-shape that we walk on so in each square I can fit seed tape lengths that are about 3 1/3 ft long.)
Step 2: Planning Phase cont'd-- On another piece of paper, take the measurements you just figured out and write down how many pieces of seed tape you need to make in each size. Then under each size, write down what kinds of seed tape you plan to make (ex, 1 carrot, 1 pak choi, etc) and how far apart the seeds should be spaced. (For example, in the 3 1/3 ft tape I needed to make 2 lengths of Japanese Red Mustard Greens and the seeds should be spaced 6" apart on the tape.) I also found it helpful to include when I planned to sow this in the garden since this helps you sort the tape later when you go to store it.
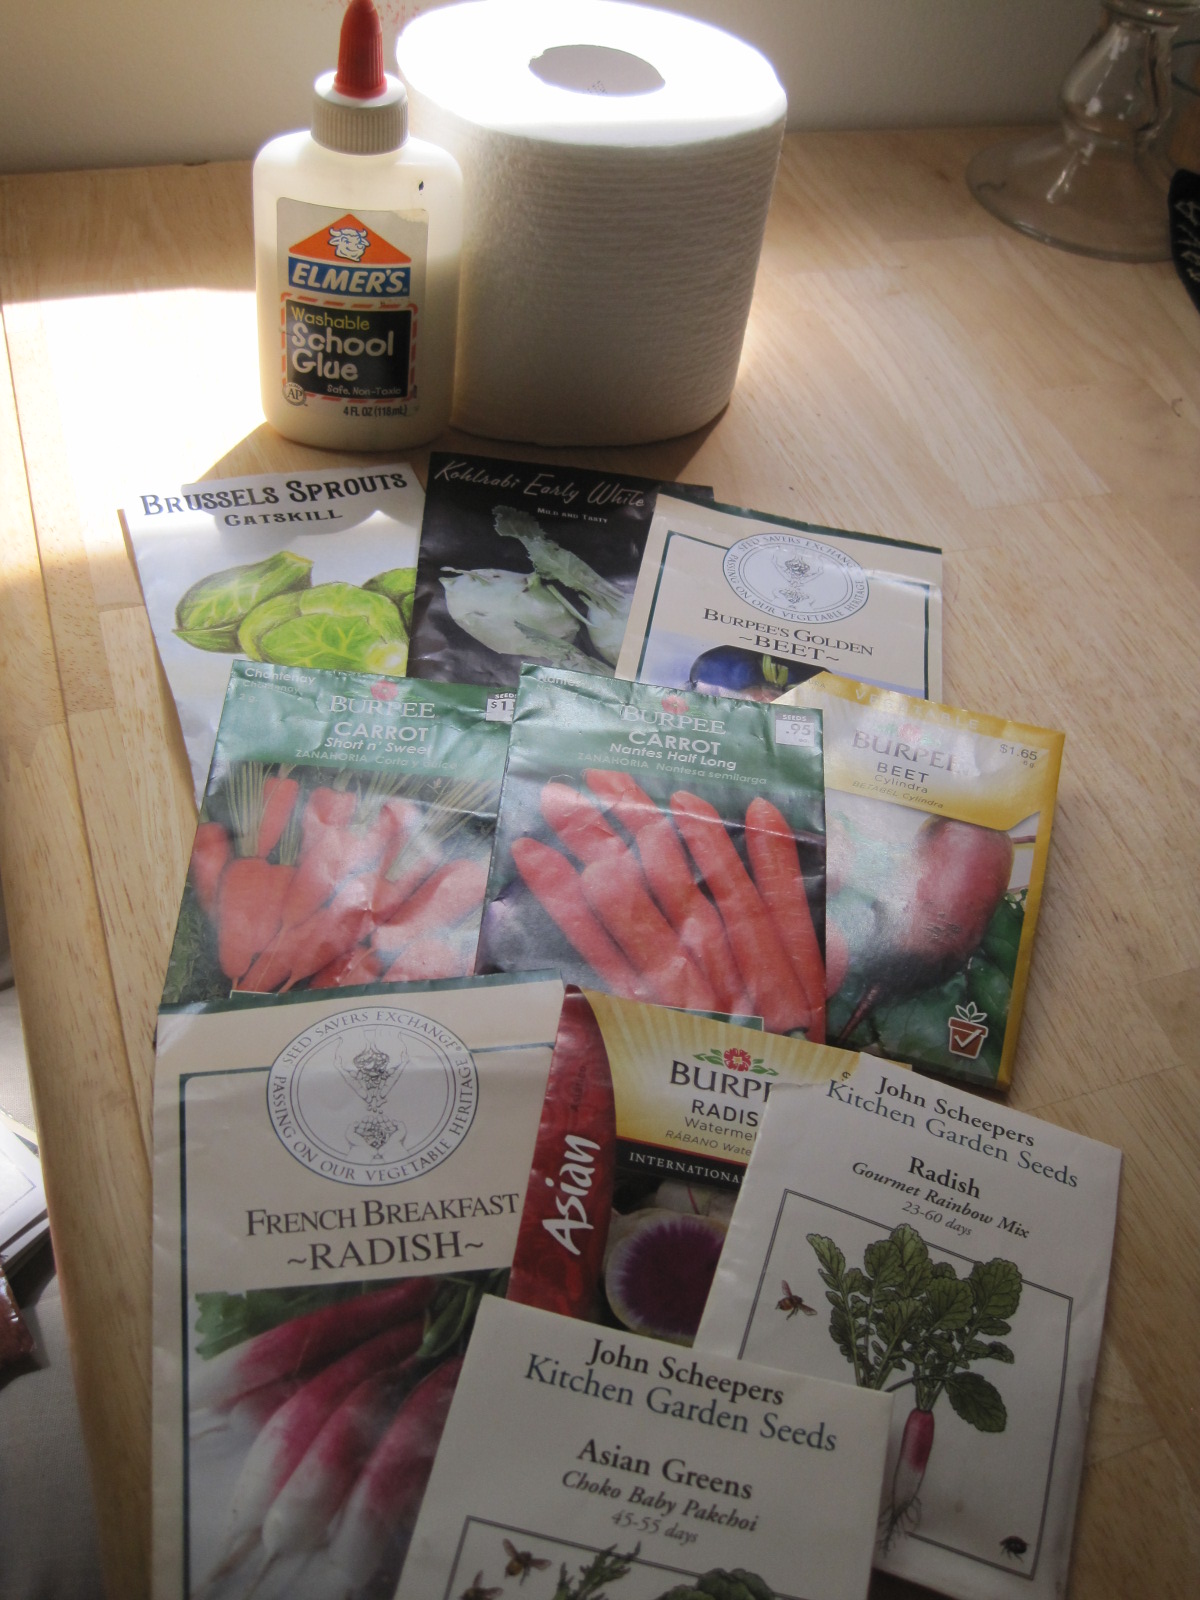
Step 3: Get out all your supplies for making seed tape. Garden Betty's post pretty much covers what you need. The only extras I included were a ruler, a bowl for holding the seed and some tweezers for the really tiny seeds. I also got out my pop-up dry rack (you'll see why later).
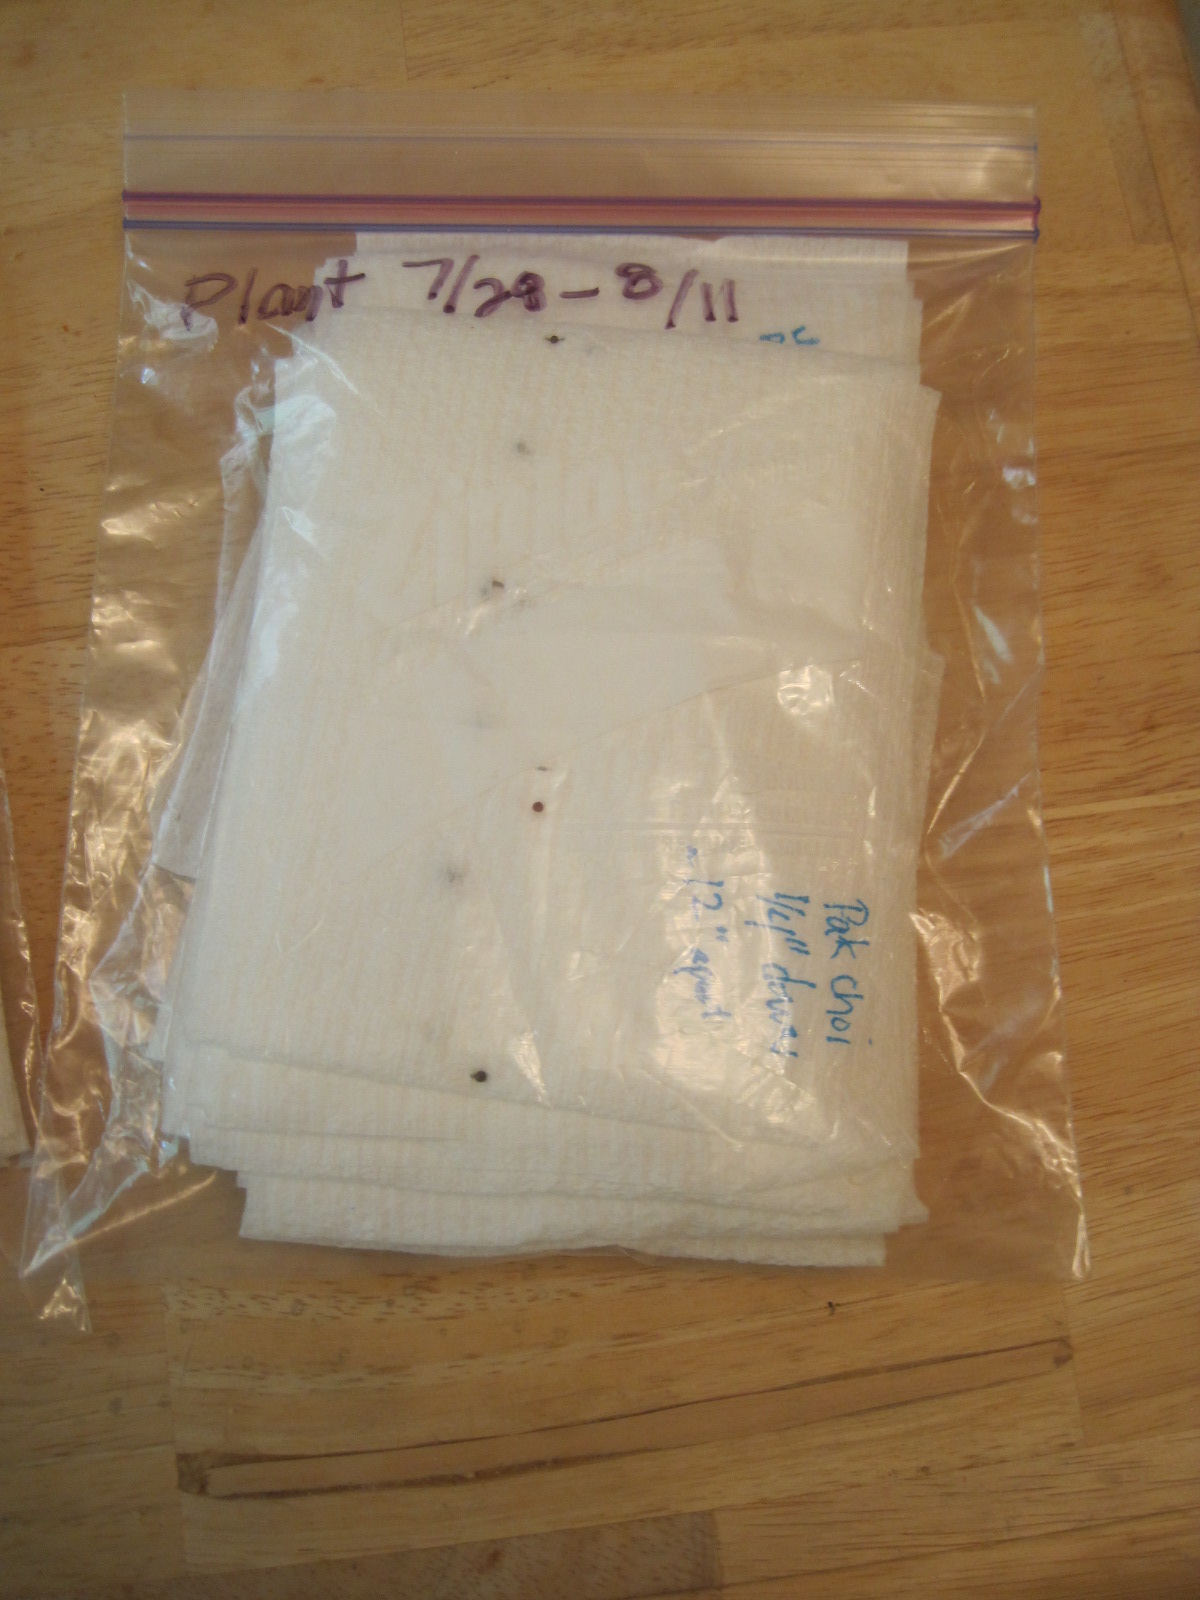
Step 4: Pop in your headphones and start making your tape! Again, Garden Betty's instructions pretty much cover the waterfront but essentially, you start by cutting your TP to the correct lengths (based on your list). You can use 1-ply TP or split some 2-ply (which I did--very easy). Label each tape. You may also find it helpful to write down the planting depth information since you may not have the packets with you when you use the tape. Take your ruler and mark off the right intervals for the seed you are gluing (again use your list). You can just eyeball it if you are really good with measurements. Then start gluing and putting on the seeds at those intervals. Garden Betty did hers in a zig-zag but I did all of ours straight across.
Tip: I found the first time I did this that the glue soaks through quickly and can make the tape stick to your surface as you are still making tape. To make drying easier and prevent sticking to the table as I worked, I put my pop up dry rack next to me and fed the tape onto it as I worked. Then I readjusted the finished ones across the rack (taking care to make sure that the gluey parts were not on the poles). Let dry overnight.
Step 5: Put your dry tape in a bag (preferably waterproof) and store the same way you store seed. If you have used a planting schedule you can mark your bags according to when the seeds should be planted and then divvy them up that way. I have ours separated this way according to our Fall Garden Plan.Then when you are going over to your community garden, you grab the bag for that week and you are good to go!
And that's it! We now have tape for all the seeds we plan to plant in our fall garden. Hopefully we won't be too tired to actually put them in. I would love to hear people's comments if this is helpful to you. Happy gardening!
Featured on Frugal Days, Sustainable Ways.
Also featured on Simple Lives Thursday.
Subscribe to:
Posts (Atom)